Tuesday 6 August 2013

Chili (phrik khi nu suan)


My Garden mouse-dropping chilis are doing well, and we have harvested several times for some weeks now. The oldest of the plants are just about two meters high, and look very healthy and happy.

Lots of green chilis on the plants.
Just a few more days and they will start to turn red.


These ones are ready for harvesting.


Even though all the plants is made from seeds from 3 red chilis, this single plant produces white/yellow chilis.

Sunday 4 August 2013

Compost


The picture above shows what the second compost - which was started in the beginning of may - looks like now 3 months later. The first compost I turned several times, but the second one has not been turned, and has decomposed nicely. This will save me a lot of hard work in the future.

The original compost has been emptied and repaired and is now ready for another round.
Filled up again with layers of withered leaves, grass, weeds and compost on top.

Thursday 9 May 2013

Garden mouse-dropping chili

Garden mouse-dropping chili flowers.
Garden mouse-dropping chili is a cultivar of the species Capsicum annuum. It measures around 50,000–100,000 SHU, and is the smallest and hottest of the five main chilis generally used in Thai food. In Thai it is called พริกขี่หนูสวน (phrik khee nuu suaan).

Support made from bamboo and nylon wire.
I have started to grow this plant from seeds taken from chilis bought at the local market. So far I have 81 plants and several more seedlings ready for planting, when I get the soil prepared. Within the last week the oldest plants are starting to flower.
We are just entering the rainy season, and have had our first big thunderstorms, that was a little hard on the largest of the plants. The chilis survived but the plants was growing in a 45 degree angel in the morning. I'm not sure they will survive the heavier thunderstorms that will come, so I am starting to build supports for the plants. It's pretty simple with a bamboo pole in each end of the rows, and some smaller bamboo cuttings to hold the poles in place. Between the poles there's two strings of nylon wire - one on each side of the plants.

Now it's just to wait and then hopefully harvest lots of tiny spicy chilis.

Wednesday 8 May 2013

Making more compost

Expanding the compost.
Since the original compost is working very nicely, I decided to make two more in connection with the first one. The design is almost the same as the original one. The vertical supports made from the stem from coconut leaves, decompose too quick, so they have been changed with bamboo.

The third compost almost finished.
The two new is the same size as the first one - 3,8 x 1,5 x 0,8 metre - giving me room for making a little over 13 cubic metre of compost.

Thursday 14 March 2013

Where it all starts

My seedling table.
Just a quick shot of my seedling table, where all that's growing in the garden, starts its life. The table is located at the edge of my orchidshadehouse with a few papayas around, giving the seedlings filtered sunlight mixed with some short periods of direct sun. I have found that to be the best way to start them. If I give them too much shade, they will die from sunburn, when they are moved to their final growing place. Giving them to much direct sun, and they will die quick.

At the moment there are 3 different types of chili, sweet peppers, okra, 2 types of papaya, beans, eggplants, some orange and lemon trees and a single Kare tree.

Friday 1 March 2013

Zucchini suicide

The Zucchini got 6-7 cm. long and is now starting to rot.
The sweet little Zucchini got 6-7 cm. long, before it started to rot yesterday. From the info I can find, this should be because the female flower, has not got enough pollen grains from mail flowers to be fully pollinated. This makes the plant loose the fruit, that will not contain seeds, before it uses too much power growing it.

While easy to grow, zucchini, like all squash, requires plentiful bees for pollination. In areas of pollinator decline or high pesticide use, such as mosquito-spray districts, gardeners often experience fruit abortion, where the fruit begins to grow, then dries or rots. This is due to an insufficient number of pollen grains delivered to the female flower. It can be corrected by hand pollination or by increasing the bee population.

It's not at big problem, that I have to do the pollination myself - I can do that. The sad part is, that this probably means that the ecosystem out here in the paddyfields is in a bad state or maybe even completely destroyed by the farmers use of alarming amounts of pesticides.

Wednesday 27 February 2013

Zucchini success

The first yellow Zucchini is about 5 cm. long.

Raised bed with Thai eggplants and Zucchinis.
Since my wife a few years back tasted my dads homegrown zucchinis stuffed with pork and herbs on a holiday in Denmark, she has wished for me to grow her some here in Thailand.

I have tried several times without any success. Most of the seeds germinate fine, and grow to quite large plants. But before there's any sign of flowering, they slowly wither away.

If it is because they have been too moist in the rainy season or too dry and hot during the summer, I'm not sure.

But now finally with the last four seeds I had left, it looks like I have cracked the code. The four seedlings - one yellow and three green - was planted in a raised bed allready filled up with Thai eggplants, and they are thriving there.

The soil in the raised bed is a mix of compost, old pig manure and our local red clay soil covered with mulch/compost. The bed is watered every evening.

Now it won't be long before there is stuffed and grilled Zucchini on the dinnertable.

Thursday 21 February 2013

Status on the new compost

The new compost after nearly a month.
It has been close to a month since I build my new compost, and even though a bit optimistic to open it up allready, I decided to take a look inside.

At the bottom it's completely dry.
It was hot inside, smelled like compost and was moist until I reached halfway down, where the center was completely dry. So at least here in the dry season, I need to water it some more.

The most decomposed material was removed and used as mulch in some new beds I have made for Thai eggplants. The rest was put back, covedered with fresh weeds and given a good watering and then coverered with a layer of bananaleaves and a thin layer of soil on top.


Saturday 26 January 2013

Grilled Chicken


Yesterday it was time to try the charcoal I made last week.

I picked up three chickens at the local market and cleaned them. Made a marinade from crushed black peppercorns, sugar, salt, lime and palm oil and coverered the chickens with it. A few handfulls of garlic, chilis and red onions was mixed with the rest of the marinade and stuffed inside the chickens.

Then I fired up my barrel grill with the newly made charcoal, and when it was ready the three birds was put indside and the lid closed.

A good friend showed up, and the next 90 minutes was spend talking and enjoying a few cold beers - which might be the reason I forgot to take a picture of the finished result. But I guarantee you, that these were the best grilled chickens I have made so far. Crisp on the outside, juicy and tender inside and very tasty and delicious.

Thursday 24 January 2013

Building a compost

For some time I have piled all my weeds, leaves, dead bananaplants and leftover organic kitchen waste in a big heap, and even though it has slowly decomposed at the bottom - and provided som nice compost, I have been thinking that it could be done a little more controlled and effective.

To keep it simple I decided to make it from coconut palm leaves, wood and a little plastic and metal wire to tie it together. Even though it will not last forever, it is allmost free and when it's done, it can be thrown into a new compost, when the plastic and metal is removed.

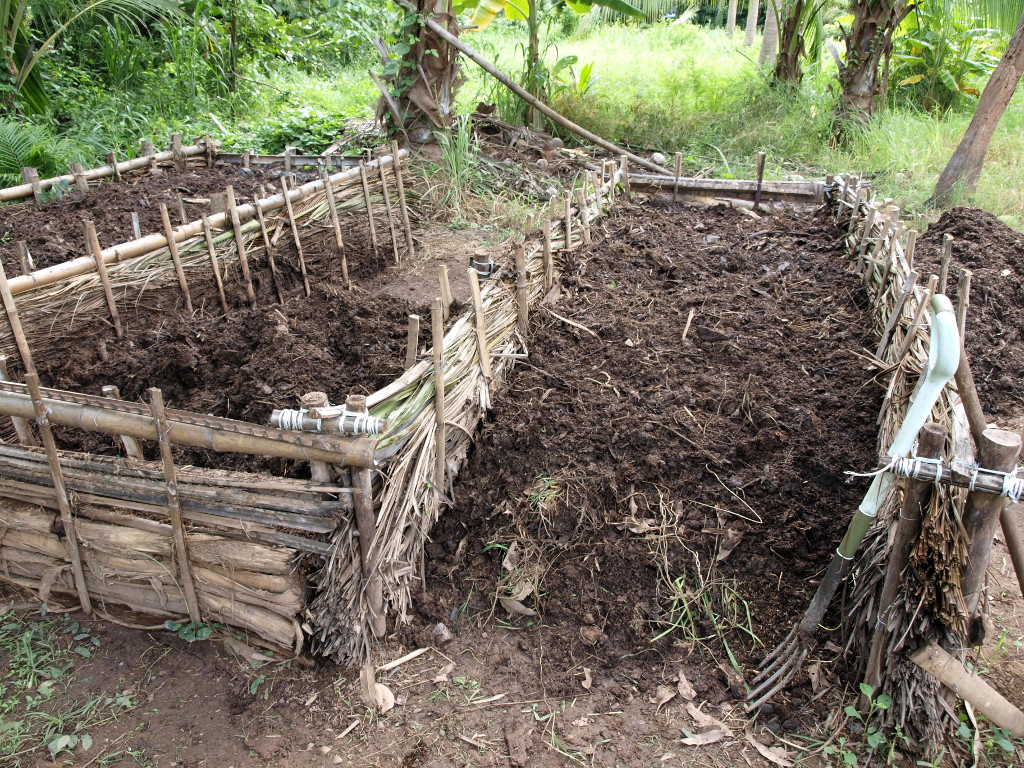
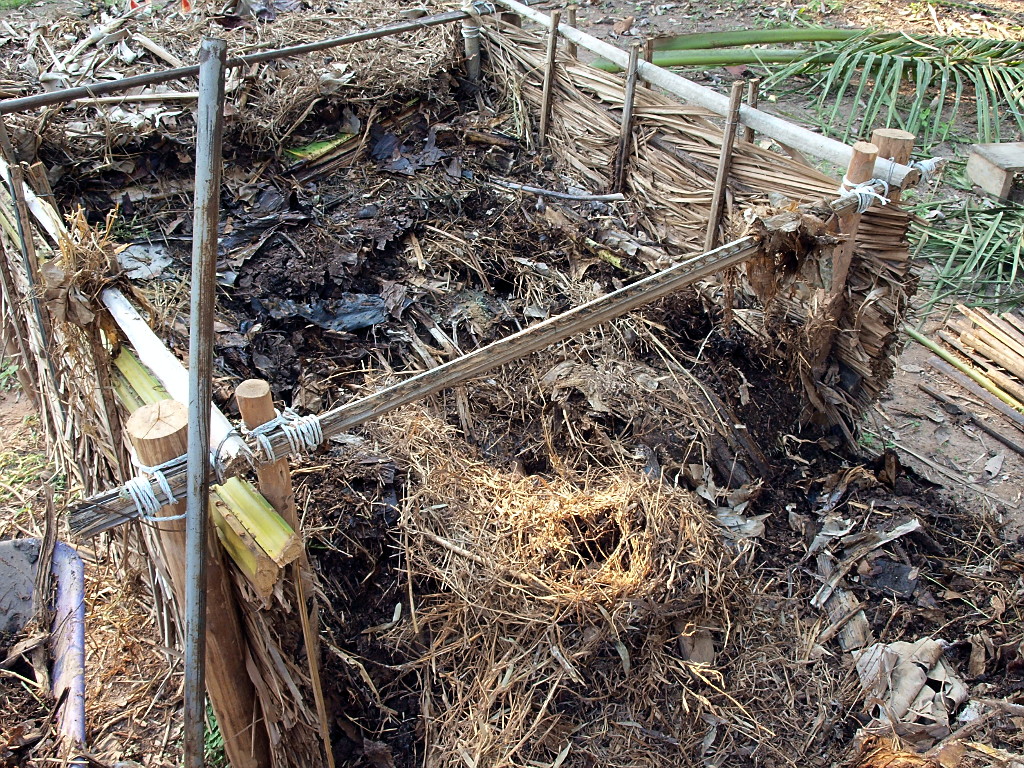
After measuring out 16 wooden poles was hammered into the soil, and everything was tied together at the top with the hard center from old dry coconut palm leaves.

One side is filled up with palm leaves and cleaned at the ends. To keep the palm leaves in place, I had to add some ekstra support made from the hard center of palm leaves.

Both sides are filled and one end is closed. I'll keep the other end open to use for removal of fresh compost.

And then it is filled up with the top layer from my old compost heap. On top of that a layer of compost, then a good watering and on top of that a few buckets of sand and then old bananaplant stems and leaves.

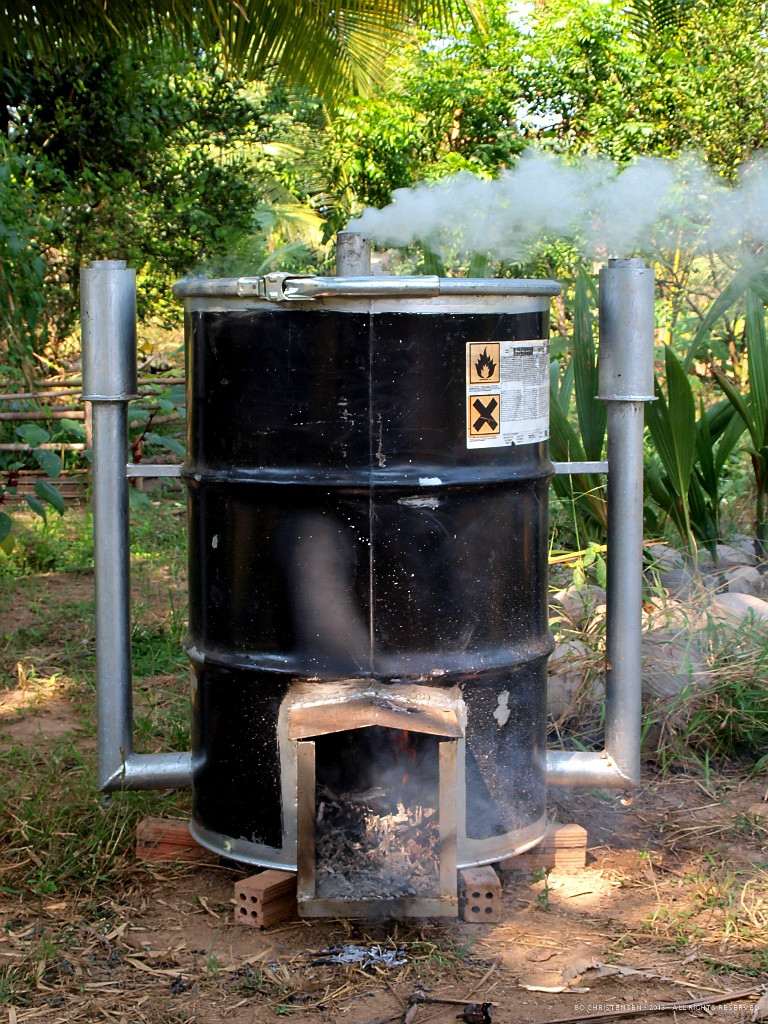
I haven't seen any of the locals out here making compost. Usually all weeds are cut down - or sprayed with chemicals - and burned when dry. My wife thinks I'm crazy piling up this amount of organic material, and says it will become a snake og rats nest. I just can't watch all this potential compost get wasted, and our red clay soil would benefit much from it - so for now I just have to compost.

Saturday 19 January 2013

Burning charcoal


Some time ago my wife gave me a charcoal kiln, made by a local guy from an old oil barrel, which I haven't had the time to try out yet. Last week we got a load of old hardwood logs from a familymember, and I decided that now was the time to try and burn charcoal for the first time.

I have now tried the kiln two times with the same result. About half of the wood is burned to perfect charcoal and the rest is inadequately charred wood.

After a lot of reading I think the problem is that my logs are to different in size - some of them too big for this small kiln. And then I'm probably closing the airintake too quick.

Anyways I still have a big bag of selfmade charcoal, that I will soon use to make grilled chicken.
Opening the kiln for the first time.

Half the wood looked like this.


Thursday 17 January 2013

Tilapia fish farm visit

The floating cage system seen from the riverbank late afternoon.
Yesterday I visited a friends cousin, who has a cage system fish farm floating in the Nan River. After a short inspection of the floating farm, fish was catched, killed and cleaned. The rest of the day was spend in the shade on the riverbank steaming, grilling, eating and enjoying cold beverages.

Below some of the pictures I took during the day.


Tuesday 15 January 2013

Growing pumpkins

Pumpkin flowers.
Recently I decided to try and grow pumpkins, and saved two seeds from a pumpkin bought at the local market. The seeds were put in pots and germinated well. Actually most of the seeds - which were tossed on the ground beside our outside kitchen - germinated, and we now have several pumpkin plants growing wild.

The two plants in the raised bed.
The two seedlings I made, was put in each end of a raised bed together with 10 small chili plants and the soil was covered with compost and leaf litter to keep the weeds away and retain some moist in the soil.

It turns out that the chilis was not the best choice for this bed. Even though they have managed to grow out over the top of the dense cover of pumpkin leaves, the pumpkins are to big and fastgrowing for the chilis. For several weeks every morning I have had to release the chilis from being strangulated by the pumpkin tendrils. I think papayas will be a better companion for the pumpkins.

The first little pumpkin.
The pumpkins are doing very well and are growing fast. With the help from some bamboo sticks the wines have been guided to grow around in the bed a few times - and after that outside the bed - still using some sticks to try and keep the plants in a controlled area. Not doing that I would have wines growing in 10 different directions. The flowers are plentifull and the first small pumpkins are starting to pop up. Now it's just watering, feeding and waiting before we can hopefully harvest lots of big pumpkins.

Cleaning buds and wines.
And while we wait, we have started to harvest buds and the fresh wine tips, from the plants that grew from the seeds tossed outside the kitchen. After cutting away the hairy and hardest parts of the stems, it is fried together with chili, garlic and fishsauce for a very tasty sidedish.